Creating Shortcuts
A shortcut is a special icon that sits on your desktop. It is identified by an arrow in the bottom left hand corner of the icon.
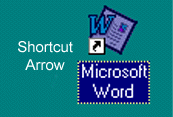
Think of shortcuts as a signpost or arrow pointing to a particular program (Microsoft Word, Windows Explorer etc) or file (a letterhead, a master invoice etc). When you double click on a shortcut icon, you open the program or file that the icon points to.
To create a shortcut, you first find the file or folder that you want to create a shortcut to. Then you drag it onto the desktop. We are going to create a shortcut to the Microsoft Word program.
- Click on the Start button and select Find/Files or Folders.
- Click on the Name & Location tab.
- Type in the program name Winword.exe in the Named field.
- Click on the Find Now button.
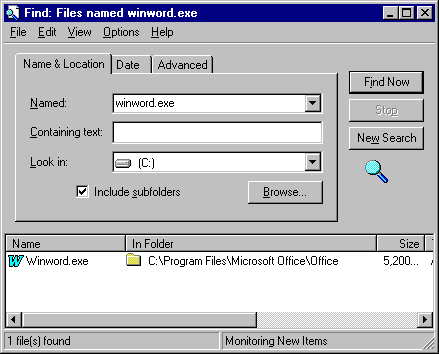
- Click right on this file (hold down the right mouse button) and drag it onto the desktop. When you release the mouse button, a shortcut menu will appear.
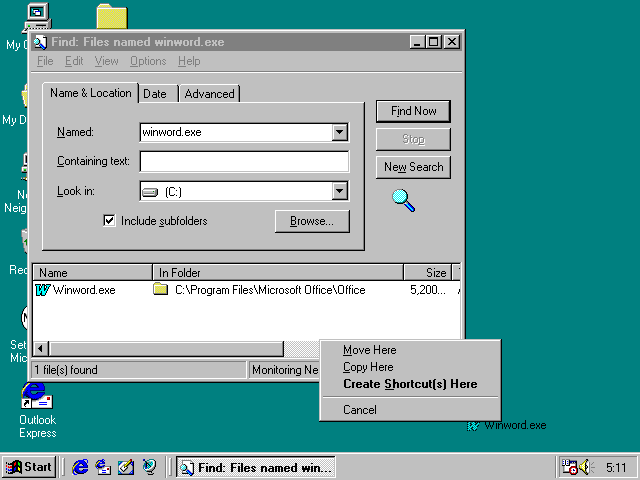
- Click on the Create Shortcut(s) Here menu option.
- A shortcut icon will appear on your desktop.
- Close the Find window.
- Click and drag (with the left mouse button) to move the shortcut icon to where you want it to be on the desktop.
Changing the Shortcut Name
You can change the name of this shortcut as follows.
- Click once on the name of the shortcut icon, wait, and click on the name again (do NOT double click). A box will appear around the name of the icon, which will be highlighted in blue.
- Type in the new name for the shortcut icon. Call it Microsoft Word.
- Press the Enter key. The shortcut icon is now renamed.
Changing The Shortcut Icon
You can also change the picture that identifies this shortcut.
- Click right on the picture of the shortcut icon. A shortcut menu will appear.
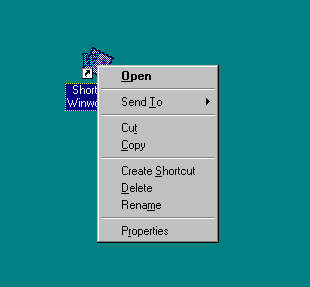
- Click on Properties in this menu.
- Click on the Shortcut tab in the window that appears.
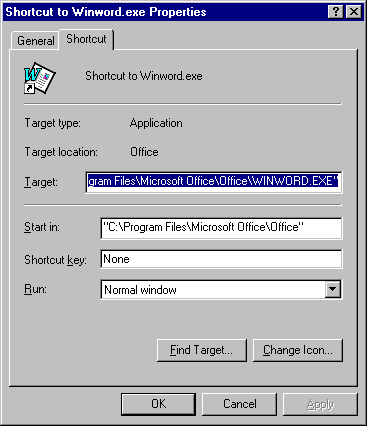
- Click on the Change Icon button. A window showing lots of different pictures will appear.
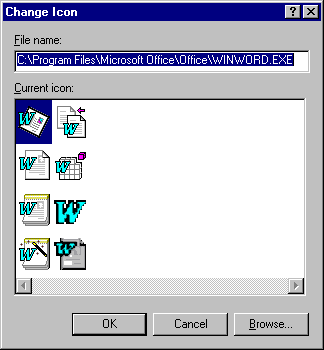
- Scroll through and look at all the pictures available to you.
- Click on the picture that you want to use for your icon.
- Click on the OK button. This will return you to the Properties window.
- Click on Apply and then on OK.
- Look at your shortcut icon. The picture will now be the one you just selected.
- Double click on your shortcut icon to open Microsoft Word.
- Close Microsoft Word.
You can create a shortcut to a document in the same way.
- Follow the procedure above to create a shortcut to the file Faq.txt, which contains answers to Frequently Asked Questions about Windows98.
- Call your shortcut FAQ-Win98
- Change the icon to one resembling a pile of paper.
- Double click on the shortcut. You will be looking at a file titled Microsoft Windows 98 Readme for Frequently Asked Questions. The file will be opened in Notepad.
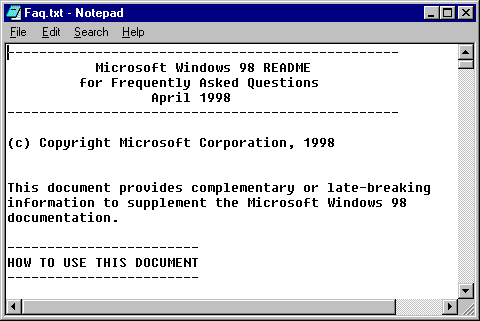
- Close this document.
Deleting Shortcuts
- Delete your shortcuts by dragging them into the Recycle Bin. Note that this deletes the shortcut (the signpost) only, and not the program it is pointing to.