Tabs
Tabs are used to align information on your page in columns. You can use the default tabs, or use a custom tab. Custom tabs can line up information on the left hand side of the text, the right hand side of the text, the centre of the text or by decimal point.
Default Tabs
These are indicated by the default tab markers on the ruler. Every time you press the tab button, your insertion point will move to the next default tab marker and any writing you do will appear here.
- Open a new document.
- Press the Tab key. Notice how the insertion point jumps to the first default tab marker.
- Press the Tab key a few more times and notice how the insertion point moves. ?
- Press Backspace. The insertion point moves back to the last default tab marker.
- Continue to backspace until you are back at the left margin.
- Close this document.
- Open the file Attributes. This contains information that we want to put into three columns.
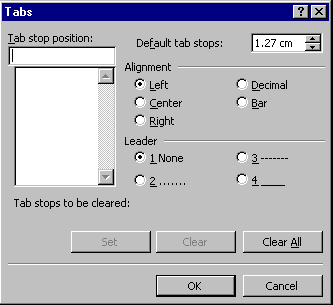
- Select Format/Tabs. The following dialog box will appear.

- Set the Default Tab Stops to 1cm and click OK.
- Check the ruler. The default tab markers should be at 1cm intervals.
- Click in front of the words Favourite Colour. Press Tab twice. This moves the text across the page.
- Click in front of the colours in the other lines and press Tab twice. This will line the colours up with this heading.
- Click in front of the words Favourite Flower and press Tab . This moves the words across the page. You have to click and press Tab on each line. You can not move all the lines at once.
- Click in front of the flowers in the other lines and press tab. This will line up the flowers with the heading. Again, you have to click and press Tab on each line. You can not move all the lines at once.
- Repeat for the other categories on the page.
- Save and close the file.
Custom Tabs
These can be set on the ruler or in the Tabs dialog box. We will use the ruler and then see how the tabs appear in the dialog box.
- Open the file Cats. This contains the attributes and prices of various breeds of cat. We want to line the information up into columns as shown on the next page.
- If the Show/Hide button is not on, click on it.
- Notice the arrows between some of the words in the file. Tabs have already been put in for you between the last three items.
- We will set custom tabs for all these lines at once using the ruler.
- Look at the box to the far left of the ruler. The symbol in this indicates what type of tab we can set. Click in the box to see the different tabs. They are identified for you below.

|

|

|

|
- We want to set a left tab at 3.5cm, a right tab at 13cm, a centre tab at 18.5cm, and a decimal tab at 23.5cm
- Select the lines you want to set the tabs for. This will be the entire document apart from the heading.
- Click on the tab symbol box until the left tab symbol appears. Then click on the ruler at 3.5cm. Click under the number and above the grey bar that contains the default tab markers. The left tab symbol will appear on the ruler.
- Click in the tab symbol box to change the symbol to that for a right tab and click on 13cm.
- Set the centre and decimal tabs similarly.
- The tabs that are already in place will have expanded to fill the custom tabs you have set. For each line, we need to insert tabs between the first items on the line to complete our tab alignment of the file.
- Click after the bolded words Pure Black on the first line and press tab. The rest of the line will move across the document and line up at the first custom tab.
- Click after the normal words Pure Black (the next section of writing on the line) and press tab. The words will move to the next custom tab. The other words should now be lined up correctly with the other custom tab markers.
- Save the file.
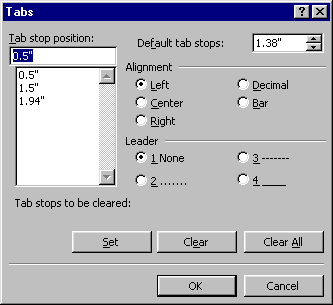
- Select all the lines of information again and select Format/Tabs. The tabs dialog box will appear showing all the custom tabs you have put in.

- Click on each tab in the Tab stop position box. The Alignment will change to show if the tab is a left tab, right tab etc.
- A Leader is a line of some sort that fills in the tab. It occurs before the tab stop. We want to put a dotted line to the prices in this file, so we need to put a leader on the tab that lines up the prices - the decimal tab at 23.5cm. This will put a line from the last item of information to the price of the cat.
- Click on the 23.5cm tab. The alignment will show it is a decimal tab.
- Click on the 2nd leader, the dotted line.
- Click on OK. The dotted line will have appeared in your file.
- Add any other leaders you feel necessary to the file.
- Save and close the file.