Changing The Way Your Desktop Looks
- Double click on the Display icon to show the Display Properties dialog box
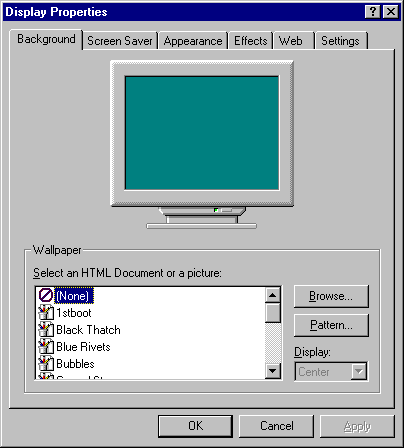
Wallpaper And Patterns
- Click on the Background tab. This is where you change the pattern on your desktop.
- Click on the Pattern button to display the list of patterns available.
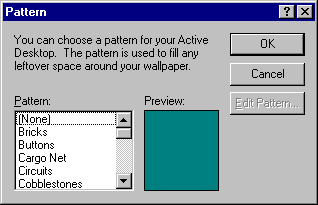
- Click on the various patterns listed in the Patterns field. The green square shown will change to show you what the pattern looks like.
- Click OK to see the pattern displayed on the computer monitor on the Display Properties dialogue box.
- To see the pattern on your actual desktop, click on the Apply button.
- Click on the various patterns listed in the Wallpaper field. The computer monitor shown will change to show you what the wallpaper looks like.
- There are three option for displaying your wallpaper on your computer. They are listed under the Display option. Click on the black down arrow next to this field to see the options.
- Select Centre to see the wallpaper in the middle of your desktop only. Select Tile to cover the desktop with your wallpaper.
- Select Stretch to stretch the picture to cover your desktop.
- To see the wallpaper on your actual desktop, click on the Apply button
- When you have decided on a pattern and/or wallpaper, click on Apply to make the change to your desktop. Note that wallpaper will paper over the desktop pattern and hide it.
Adding Wallpaper
- Sometimes you want to make your own wallpaper from a picture. To do this the picture must be in Bitmap format.
- Save the picture on your computer in Bitmap format. Remember where you saved it.
- Click on the Browse button. The following dialogue box will appear.
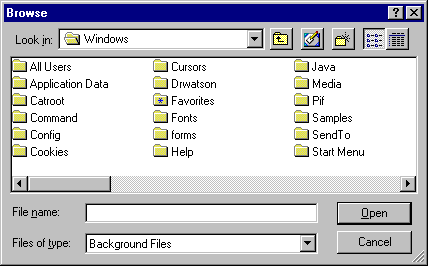
- Click on the black down arrow next to the Look In box and move to the disk your picture is saved on.
- Double click on folders to open them until you find your picture file.
- Click on Open.
- Your picture file will now appear as an option in the wallpaper box.
- Select your picture as wallpaper by clicking on it.
- Choose Tile, Centre or Display to arrange your picture on the desktop.
- Click on Apply to put the picture on your desktop.
- You can also use the Browse button to select html documents saved from the web as wallpaper.
Screen Savers
- Click on the Screen Saver tab. This is where you set the screen saver for your computer.
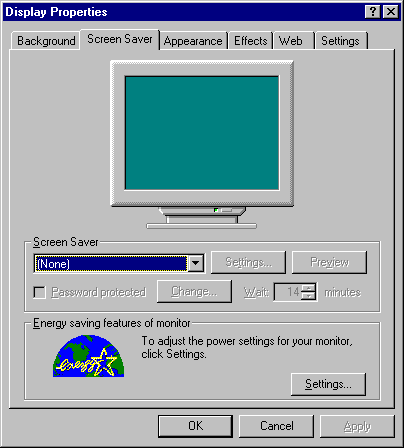
- Click on the black down arrow next to the Screen Saver field. A list of screen savers that come with Windows 98 will appear.
- Scroll through the list. To view a screen saver, click on its name. The screen saver will appear in the monitor shown in the dialog box.
- To see the screen saver on your screen, click on Preview. Your screen will black out and the screen saver will appear. To return to your screen, move the mouse.
- Click on the Settings button. This allows you to change elements of the screen saver such as colour, number of objects, etc. Make any changes you wish and then click on OK to return to the Display Properties dialogue box.
- Just under the Settings button is a field called Wait. This lets you enter the number of minutes to wait before the screen saver comes on. Use the little black arrows next to the field to change the wait time to 5 minutes.

- Click on Apply to set the computer with your changes.
Individual Items
- Click on the Appearance tab. This is where you change the way that individual parts of your desktop look like.

- Click on the black down arrow next to the Scheme field. A list of colour schemes will appear.
- Click on a colour scheme to see previewed in the top half of the dialog box.
- To change your computer to this scheme, click on Apply.
- The bottom two rows of the dialog box deal with each individual item on the desktop. Click on the black down arrow next to the Item field. A list of all the items you can change appears.
- Click on Desktop.
- To change the colour of the desktop, click on the black arrow next to the Colour field. A selection of colours will appear.
- Click on a colour to change the desktop to that colour. To set the colour yourself, click on the option More Colours and select a colour from those available.
- Select some other items and experiment with changing their appearance.
- Click on Apply for your changes to take effect.
- To save your colour scheme, click on the Save As button and enter a name for your scheme.
- Click on OK to save the scheme. Notice that it appears in the list of colour schemes available to you.
- Click on OK to close the dialog box.
Click on the Effects tab. This is where you can change your icons.
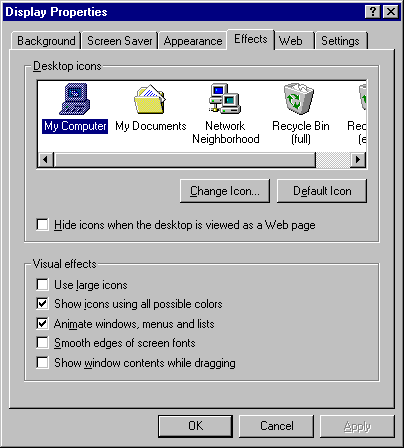
- To change an icon picture, select the icon you want to change in the top box. We will change the icon for My Computer.
- Click on the Change Icon button. The following box will appear.
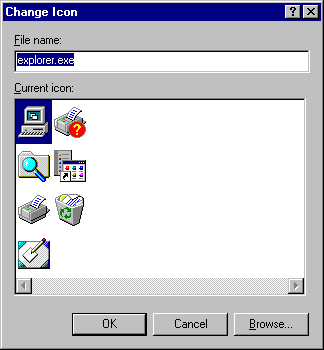
- Click on the picture you want to change the icon to, then click on OK. The icon on the Display Preferences dialogue box will change.
- Click on Apply to change the icon on your computer desktop.
- Click on the Default button to return the icon to its original picture.
- Click on Apply to change the icon on your computer desktop.
- Click in the box to select the first option from the list: Use Large Icons. The box will have a tick next to it when this option is selected.
- Click Apply to make all your icons larger.
- Deselect the option and click Apply to return the icons to their usual size.
- Try some other settings to see their effect on your computer.
Web Settings
- Click on the Web tab. This lets you make certain changes to your desktop.
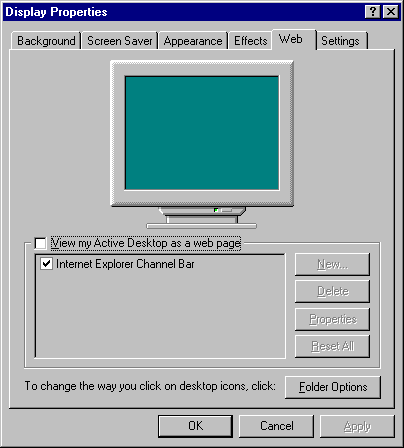
- Select Show my Active Desktop as a Web Page to change your desktop to a blue colour with the windows logo. This does not set up your icons as web links, you need to go to Folder Options to do that.
- Click on the Internet Explorer Channel Bar option to select it (put a tick next to it). This displays the Channel Bar on your desktop.
- Deselect this option (click on it once to remove the tick) to remove the Channel bar from your desktop.
- Click on Reset to return your desktop to the Web Page default settings.
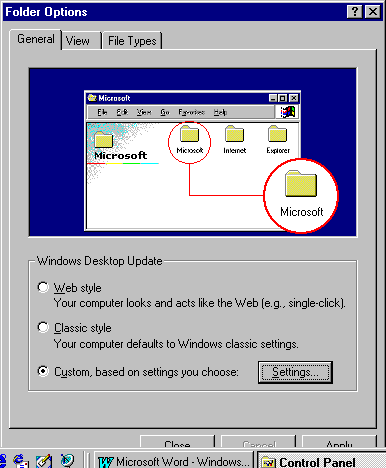
- Click on the Folder Options button to display the Folder Options dialogue box. This will save and close the Display Properties dialogue box. You can then make any changes you wish in the Folder Options dialogue box as discussed in Windows 98 Module 1.
- Open the Control Panel and double click on the Display icon to return to the Display Options dialogue box.
- The Settings tab in this dialog box relate to the hardware settings of your computer. It is wise not to change these without consulting a technician first.
- Click on OK to close the Display Options dialogue box.