The Word Screen
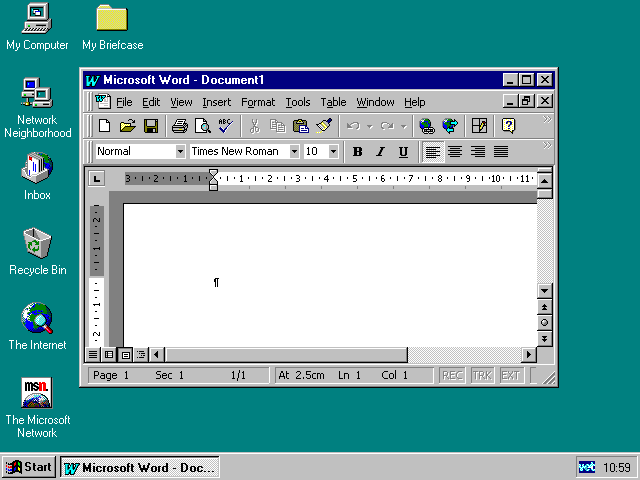
- On the previous page you opened Word97 by selecting Start/Programs/Microsoft Word. You should have Microsoft Word 97 on the screen in front of you, as shown below.
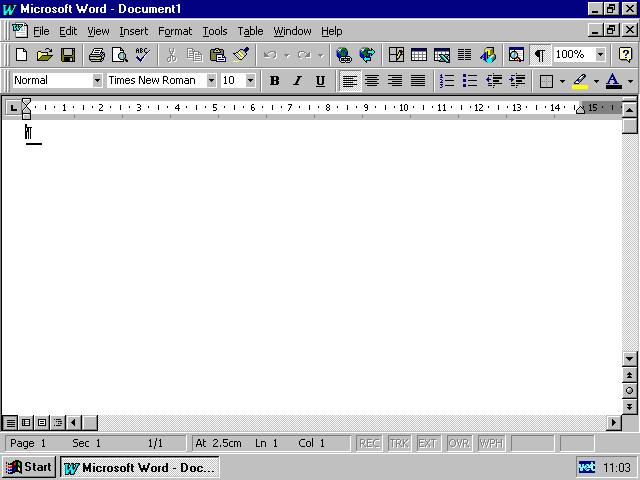
- Look at the diagram above and identify the various parts of Word 97 on your screen.
Title bar: This is the blue bar along the top of your screen. It contains the name of the program that is running - Microsoft Word - and the document that is currently open - Document 1.
Menu bar: This shows all the available menus for Word97.
Standard toolbar: This contains buttons for the tasks on the menu that are most often used.
Formatting toolbar: This contains buttons for the formatting tasks that are most often used.
Document 1: Word97 always opens up at document one.
Status bar: This tells you where you are in the document. It says what page you are on, how many pages are in your document, etc.

Page 1: The page number, based on the logical numbering scheme, of the page shown in the window.
Sec 1: The section number of the page shown in the window.
1/1: Based on the actual, or physical, page count in the document, the page number and the total number of pages.
At 2.5cm: The distance from the top of the page to your insertion point. No measurement is displayed if the insertion point is not in the window.
Ln 1: The line of text where the insertion point is located. No measurement is displayed if the insertion point is not in the window.
Col 1: The distance, in number of characters, from the left margin to the insertion point. No measurement is displayed if the insertion point is not in the window.
The next five acronyms appear in the following five boxes on the status bar. They can be greyed out (inactive) or in black (active).
REC: This shows you the status of the macro recorder. Double-click on the greyed out REC to turn the macro recorder on. Double-click on the black REC to turn the macro recorder off.
TRK: This shows you the status of the track changes function. Double-click on the greyed out TRK to turn the track changes function on. Double-click on the black TRK to turn the function off.
EXT: This shows you the status of the extend selection mode. Double-click on the greyed out EXT to turn the extend selection mode on. Double-click on the black EXT to turn the mode off.
OVR: This shows you the status of the overtype mode. Double-click on the greyed out OVR to turn the overtype mode on. Double-click on the black OVR to turn the overtype mode off.
WPH: This shows you the status of the Word Perfect help. When this option is black, Word perfect help is available. When it is greyed out, Word perfect help is not available.
The symbols below appear in one of the two boxes at the right hand side of the status bar.
& : This icon shows the status of the spelling and grammar checking. When Word is in the process of checking for mistakes, an animated pen appears over the book. A tick appears if no mistakes have been found. A "X" appears if a mistake is found. Double-click this icon to fix the mistake(s).
< : This icon shows the status of a background save. A moving disk appears to say Word is saving your document in the background ie as you work.
7 : This icon shows the status of a background print. A printer icon appears to say Word is printing your document in the background. A number next to the printer icon shows the current page number being printed. To cancel the print job, double-click the printer icon..
Page View buttons
At the bottom of your document are four buttons that control how your document appears on the screen. The four different views you can have are Normal view, Page Layout view, Online Layout view and Outline view.

You can also choose these views from the View menu.
- Click on the View menu and take note of the first four options.
You can change the view of your document by selecting a view from the menu, eg View/Page Layout; or by clicking on the Page Layout view button at the bottom of the window.
Normal View
This is the view that Word97 usually opens in. You can see only the area of your document that you are writing on.
- Click on the Normal view button to make sure your document is in normal view.
Page Layout View
This view shows the whole piece of paper you are writing on.
- Click on the Page Layout view button to show Document 1 in Page layout view.
- Scroll across the page to see the left, right and top edges.
Outline View
This lets you see the structure of your document. It shows you all the headings and sub headings in the document, indented at different levels.
Online Layout View
This view is used to make your document easier to read online. It adds a document map to one side of the screen. This is a map of the document structure. Unless you are creating documents to be read online, it is unlikely that you will use this view.
Minimise, Maximise/Restore and Close buttons
At the top right of the window are three buttons. These allow you to minimise, maximise and close either the document you are currently working in or the program Word97 itself. The buttons in the blue title bar are for Word97. The other set of buttons (in the menu bar) is for the document you are currently working on (in this case it is Document 1).

- Click on the Minimise button in the title bar. The Word97 window will vanish from your screen. Note that the program has not stopped running - it is merely no longer displayed in a window on your screen. This is what the Minimise button does. A button on the task bar with the words Microsoft Word - Document 1 on it will have changed colour from white to grey.

- Click on the Microsoft Word button on the task bar to return your Word97 window to the screen.
- Click on the Minimise button in the menu bar. The current document will disappear and a box with the name of the document on it will appear at the bottom of the Word97 window.
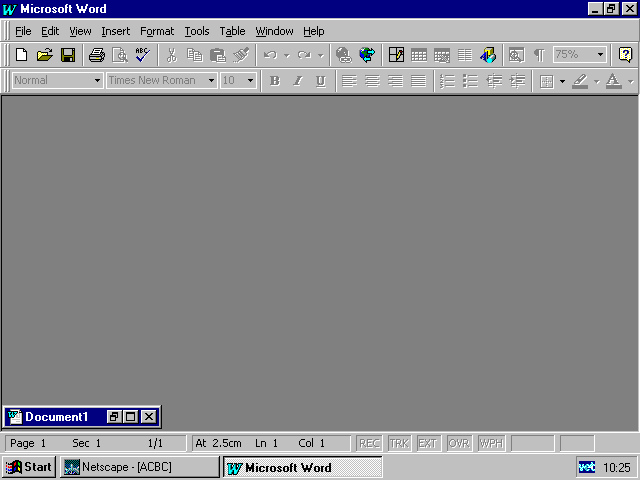
- Click on the leftmost button (it has two squares on it) in the Document 1 box at the bottom of your screen to return your document to the screen.

This button is called the Restore button. It replaces the Minimise button when a document is minimised or the Maximise button when the document is maximised.
Your window should now look like the one shown below.
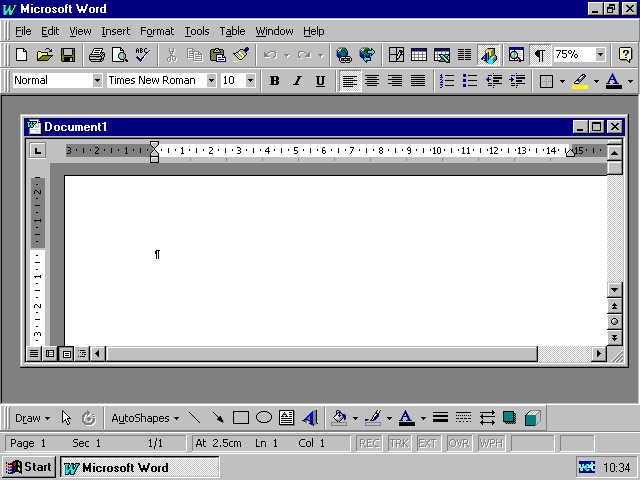
- Notice that although your document has been restored, it no longer fills up the whole window. The Minimise, Maximise and Close buttons for the document are now visible in the title bar for the document, instead of in the menu bar for Word97.
- Click on the Maximise button for the document. It will now take up the whole screen. The Maximise button will have changed to the Restore button.
- Click on the Restore button to return the window to its smaller size.
- Click on the Maximise button again to return the document to its original size.
- Click on the Restore button for Word97. The window will shrink to a smaller size.
- Click on the Maximise button for Word97 to restore the Word97 window to full screen.
- The last button to look at is the close button.
- Click on the Close button for Document 1 (in the menu bar). The document will close, but Word 97 is still running. You may be asked if you want to save the changes to Document 1. If so, click on No.
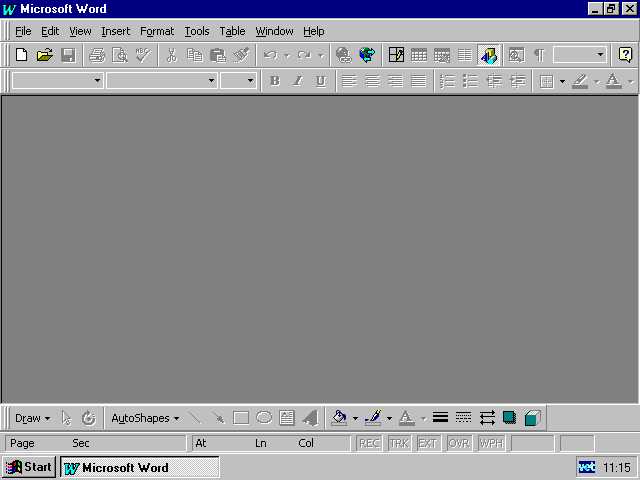
- Click on the Close button for Word97. Word97 will stop running. The window will disappear and you will be back at the desktop.
