Paper Size and Margins
The settings for the paper size and margins are found in the Page SetUp option under the File menu.
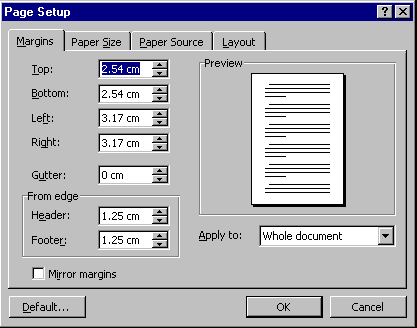
- Select File/Page SetUp. The following dialog box will appear.

- Click on the Margins tab if it is not already displayed.
- You can see the width of the Top, Bottom, Left and Right margins displayed. To change these margins, simply click in the appropriate box and type in the width you want the margin to be.
- Make the margins 2cm all the way around the invitation.
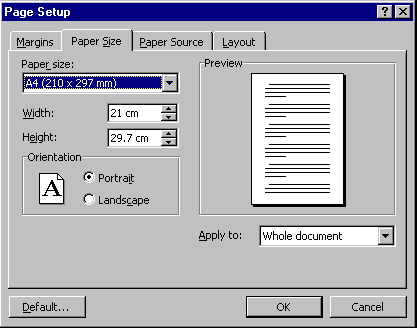
- Click on the Paper Size tab.

This is where you specify the size of the paper you are printing on, and whether you want the paper to be printed vertically or horizontally.
- Click on the radio button (the white circle) next to the Landscape orientation option. The picture of the paper will change to show you are now printing horizontally on the paper.
- Click next to the Portrait option to return the paper to printing vertically.
- At the top of the dialog box is the Paper Size option. Click on the down arrow next to this option to see the list of paper sizes available. Scroll through the list and notice the Custom option. Then return the size to A4.
- The Width and Height options are set automatically when you choose a paper size. However, if you choose the Custom option you can enter these values yourself.
- Click on OK to record your changes and exit the dialog box.
- Save and close the file.